No matter in the microscopic world, octahedron, rhombic dodecahedron, cube, tetrahedron and hexahedron, etc. are all material factors of hardness. At present, the hardest diamond in the world is made up of the carbon isotope carbon 14, which is the hardest.
How to measure which item is the hardest requires a hardness test to determine the level of hardness. Hardness test is the most simple and easy test method in mechanical property test. In order to replace some mechanical performance tests with hardness tests, a more accurate conversion relationship between hardness and strength is required in production. Practice has proved that among various hardness values of metal materials, there is an approximate corresponding relationship between the hardness value and the strength value. Because the hardness value is determined by the initial plastic deformation resistance and the continued plastic deformation resistance, the higher the strength of the material, the higher the plastic deformation resistance, and the higher the hardness value. It can be seen that hardness is not a simple physical quantity, but a comprehensive performance index reflecting the elasticity, plasticity, strength and toughness of materials.
In the steel industry, the code name for metal hardness is H. According to different hardness test methods, the conventional expressions include Brinell (HB), Rockwell (HRC), Vickers (HV), and Leeb (HL) hardness, among which HB and HRC are more commonly used. Brinell hardness (HB), Rockwell hardness (HRA, HRB, HRC), Vickers hardness (HV), the value of which indicates the ability of the material surface to resist the indentation of hard objects. The Leeb hardness (HL) and Shore hardness (HS) belong to the rebound hardness test, and their values represent the magnitude of the elastic deformation work of the metal.
Rockwell hardness
Rockwell hardness, which was proposed by S.P. Rockwell in 1921, is the hardness value of metal materials measured by using a Rockwell hardness tester. This value has no unit and is only represented by the code "HR". The measurement method is to press a steel ball or a diamond indenter vertically into the surface of the material to be tested under the specified external load, resulting in dents. For the depth of the dent, the Rockwell hardness can be calculated by using the Rockwell hardness calculation formula HR=(KH)/C. The Rockwell hardness value is displayed on the dial of the durometer and can be read directly. Rockwell hardness is an index of hardness value determined by the depth of indentation plastic deformation. Take 0.002 mm as a unit of hardness. When HB>450 or the sample is too small, the Brinell hardness test cannot be used and the Rockwell hardness measurement is used instead. It uses a diamond cone with an apex angle of 120° or a steel ball with a diameter of 1.59 and 3.18mm to press into the surface of the tested material under a certain load, and the hardness of the material is obtained from the depth of the indentation. According to the different hardness of the test material, it is expressed in three different scales:

HRA: It is the hardness obtained by using a 60kg load and a diamond cone indenter. It is used for materials with extremely high hardness (such as cemented carbide, etc.).
HRB: It is the hardness obtained by using a 100kg load and a hardened steel ball with a diameter of 1.58mm. It is used for materials with lower hardness (such as annealed steel, cast iron, etc.).
HRC: It is the hardness obtained by using a 150kg load and a diamond cone indenter, and is used for materials with high hardness (such as quenched steel, etc.).
Brinell hardness
Brinell hardness (HB) is generally used when the material is soft, such as non-ferrous metals, steel before heat treatment or after annealing. Rockwell hardness (HRC) is generally used for materials with higher hardness, such as hardness after heat treatment, etc.
Brinell hardness (HB) is a test load of a certain size, a certain diameter of hardened steel balls or carbide balls are pressed into the surface of the metal to be tested, kept for a specified time, and then unloaded to measure the diameter of the indentation on the surface to be tested. The Brinell hardness value is the quotient of the load divided by the surface area of the indented spherical. Generally: press a hardened steel ball of a certain size into the surface of the material with a certain load and keep it for a period of time. After the load is removed, the ratio of the load to its indentation area is the Brinell hardness value (HB), the unit is kg force /mm2 (N/mm2). The test load and the diameter of the test steel ball should be determined according to the actual performance of the material.

Vickers hardness
The Vickers hardness test method was proposed by R.L.Smith and C.E.Sandland in 1925. British Vickers - Armstrong (Vickers-Armstrong) company trial-produced the first hardness tester tested in this way. Compared with the Brinell and Rockwell hardness tests, the Vickers hardness test has a wider measurement range, covering almost all kinds of materials from softer materials to superhard materials.

Leeb hardness
The Leeb hardness is expressed in HL. The Leeb hardness testing technology uses a certain quality of impact body equipped with a tungsten carbide ball head to impact the surface of the test piece under a certain force, and then rebound. Due to the different hardness of the material, the rebound speed after impact is also different. A permanent magnet material is installed on the impact device. When the impact body moves up and down, its peripheral coil induces an electromagnetic signal proportional to the speed, and then converts it into a Leeb hardness value through an electronic circuit.

Shore hardness
Referred to as HS. A measure of the hardness of a material. It was first proposed by the British Shore (Albert F.Shore).
The elastic rebound method is used to drop the striker pin from a certain height onto the surface of the tested material and the rebound occurs. The striker pin is a small cone with a pointed tip, often inlaid with diamonds. The test value is 1000x the return speed of the crash pin/the initial speed of the crash pin (that is, the speed ratio before and after the collision multiplied by 1000)

Barcol hardness
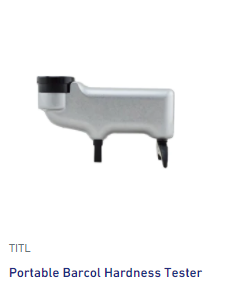
Barcol hardness (referred to as Barcol hardness), the earliest hard steel indenter with a certain shape in the United States is pressed into the surface of the sample under the action of the standard spring test force, and the hardness of the material is determined by the indentation depth of the indenter. Define a unit of Barcol hardness per pressing 0.0076mm. The Barcol hardness unit is expressed as HBa. Barber-Colman proposed that it is a hardness category widely used internationally in modern times.

Knoop hardness
Knoop hardness is a hardness measured as an absolute value, and this value is mainly used in processing. Generally speaking, the Knoop hardness of diamond is 7000~8000 kg/mm2
Webster hardness
A hard steel indenter of a certain shape is pressed into the surface of the sample under the action of the standard spring test force, and the indentation depth of the indenter is used to determine the hardness of the material. The indentation depth of 0.01mm is defined as a Webster hardness unit. The Webster hardness unit is expressed as HW.

For more information on this source, please visit http://www.titltest.com If you need to know more details about the instruments or equipments mentioned, please contact support@titltest.com

